Peony Garden Suite
Today I want to share the Peony Garden Suite with you. This suite has a pretty stamp set with coordinating dies, and dies to create a gorgeous 3D peony.

This is the finished peony flower that I started in the video. The video shows a number of cards made with the set, and all the pieces from the suite. Be sure to read to the bottom of this post to see photos of the steps to create the gorgeous 3D peony.
To create the 3D peony and leaves, use the dies to cut the pieces in this photo.

Sponge the edges as desired.

Use your bone folder to curl the edges out. The more you curl the edges, the more 3D your flower will be.

Starting with the smalles piece, insert it into the 2nd smalles piece with the top at the front, and the bottom going behind.

Continue to insert this piece into the next larger piece. Line up the notch on the bottom of each piece to get the correct placement of the flower layers. I have put a red dot on the notches that you want to match on top of each other. Glue the pieces together along the back bottoms.

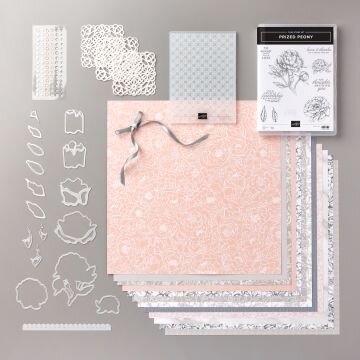
This whole suite of products is a great addition to any stamping collection. There are lots of beautiful products to choose. Click the image below to go to my online store to show for these products now.