
Cut and Create Crafty Cards
Welcome to a new feature on my blog, Cut and Create Crafty Cards. These posts give you some great ideas to get your lovely Designer Series Paper off the shelf and actually use it to create beautiful cards. Many of us love the stunning DSP that Stampin’ Up! offers, but many of us also have difficulty cutting it and using it! We want to save it for the exact right project. Unfortunately that often means it sits on the shelf for way too long, and never gets used. I’m here to help inspire you to USE it. You will love the results, have lots of gorgeous cards for your friends and family, and let’s face it, you can always get more!!
Here is a whole raft of cards for today’s inspiration.

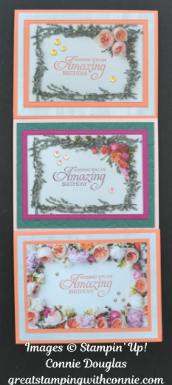
I used the stunning Petal Promenade DSP for all these cards. Sadly, this DSP will only be available until the end of May, so now is the time to get it if you want to make some of these beautiful cards.
The secret to all this is to plan to make a bunch of cards all at once, from one pack of DSP. That way you can work in an assembly line fashion. I cut all my DSP, cardstock and layering pieces at the same time. You can find the perfect colour pallette on the back of the DSP package, so you know all the coordinating colours. I cut card bases in coordinating colours to be ready for the assembly step. For really quick cards, cut your DSP at 5 1/4 x 4 inches. This will give you full card front sized pieces to really show off your DSP.

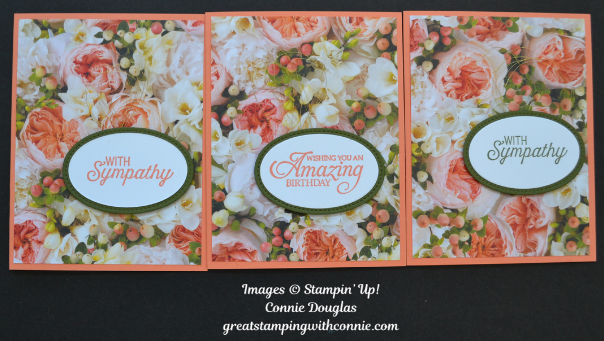
I also cut medium sized pieces for my sentiments using the Layering Ovals and Stitched shapes Framelits Dies. Using a medium size gives you lots of flexibility for stamping your sentiment later, and since there are no other stamped images on these cards, you can still show off the beautiful DSP. If you plan to use punches for your sentiment you can punch those in advance or after you stamp as you are putting your cards together. The idea is to get all your Big Shot work done in one fell swoop, so assembly is quick and easy. Punches give you easy flexibility whether you use them now or later!

This DSP gives you some gorgeous patterns, and there are also two sides with lovely frames. I decided to use these frames for some of the cards so cut them with the Rectangle Stitched Framelits, and Layering Circles Framelits Dies, and some I just cut around the borders. I also cut one size larger for my layering piece.
I embossed some of the card back layers, one just on the bottom, so I could adhere my flowers at the top., and the other frame cards have the ‘back’ of a piece of DSP for the back layer.

With all my cutting done I was ready to stamp and assemble - the create step!
Many of you know I am a big Toronto Blue Jays baseball fan, so I often spend time working on cards while watching the game on TV. These cards were the perfect project to complete while the game was on. I had all my pieces ready to go, some coordinating ink pads and a variety of sentiments. Stamping was quick and easy with everything ready. For the cards that used frame pieces, I stamped right on the DSP.
Next was final assembly and adding embellishments. I used ribbon, bows, linen and gold metallic thead, metallic pearls and sequins. You can use whatever you have to add a special touch to your cards.

It is a bit hard to see the Metallic Gold Thread in the larger photos, here is a close up of the gold loops I added behind my sentiment for a subtle accent on these cards.
And there you have it. Eleven beautiful hand made crafty cards ready to send, or box up as a lovely hand made gift.
I hope you give this a try. Cut & Create Crafty Cards is easy and fun, and will mean you have a nice supply of cards on hand for whenever you need them.
Happy Crafting!